How Can We Help?
Entering New Resident
1.
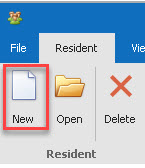
Start out on the Resident Tab of the Resident Data Grid and click on the New Page icon.

2.
The Primary Resident Information page should appear.
Enter in resident info. You can use the calendar from the drop-down to enter in dates. If you do not have the Admit Date, select today’s date. Fill in the resident’s Name (all text will be in capital letters by default), Unit, Room Number, and Birth Date. If you do not know the Birth Date you may select today’s date. You can use the tab key to move between boxes. When completed, click on Save (lower right).
**If you do not want the Birthday Cake picture or message to print on the ticket when it is the resident’ birthday, right click over the date of birth and select “Hide Birthday Cake”.

3.
To modify a resident’s information (such as changing their room number, bed assignment, etc.), highlight their name on the Resident To modify a resident’s information (such as changing their room number, bed assignment, etc.), highlight their name on the Resident Data Grid and either double click or click on the open icon on the resident’s name and their profile will open.
